- Destinations
- Utah
- Glen Canyon NRA
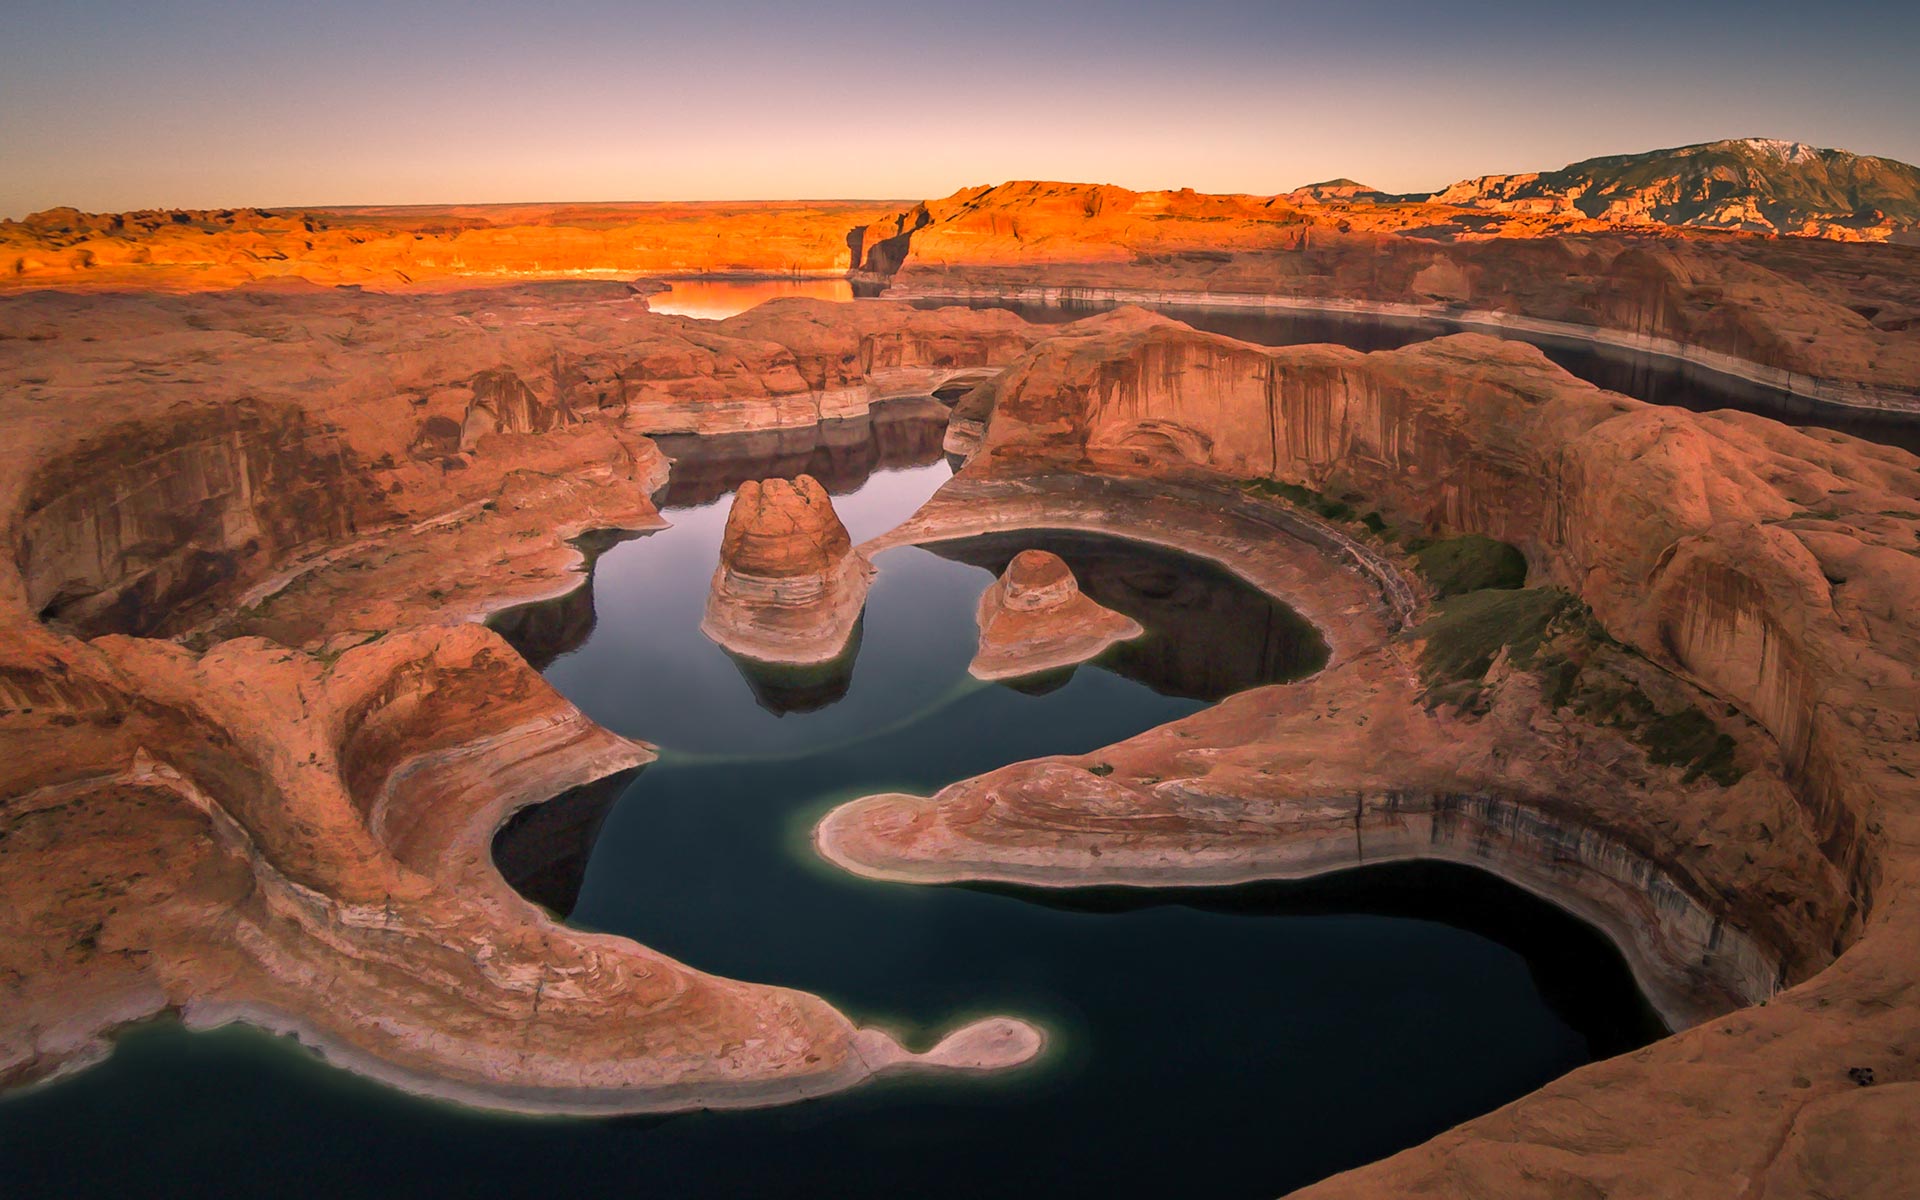
- Reflection Canyon
Reflection Canyon
Exploring the Glen Canyon has always been a real challenge. Although, since the creation of the dam at Page, AZ the entire area experienced a real boost in visitors thanks to the easiness of boats to reach even the most remote parts of this wonderful canyon. On the other hand one of the numerous downsides of damming this canyon is the unrecoverable loss of its uniqueness.
Visiting places such as the Rainbow Bridge required once multiple days trekking. Now you can get there from Page (AZ) and back comfortably in a boat, all in one day. The same principle applies to the Reflection Canyon.
To take images of it you will need to do it the old fashioned way – hiking! Be prepared, this is nothing for the faint hearted. You need to have good experience in hiking off trail and preferentially backpacking as the best moment for taking photographs there is either early morning or late afternoon. If you do this as a single day project you will miss the best light at scene.
Reflection Canyon got really famous by two different events. The first one was an article published at National Geographic under the title “Glen Canyon Revealed” April 2006. This certainly shook up several people, but the next one big event was probably the one that had an even bigger effect. Apple introduced June 2012 Mac Book Pro with a high resolution retina display using an image of the Reflection Canyon as its screensaver!
Getting to Reflection Canyon overland:
Your local trip starts at the town of Escalante. Take UT-12 eastbound for about 5 miles. Enter onto Hole-in-the-Rock Road to your right. The Hole-in-the-Rock Road heads southwest for about 55 miles until it dead ends at Lake Powell. You will drive the road almost to its entire extent. Except during or immediately after a storm, the mostly gravel-covered Hole-in-the-Rock road should not present any difficulties about 16 miles from the start. Past that point, the road becomes progressively narrower and more tortuous. The ideal is to engage this road with a 4×4 high-clearance vehicle.
During your entire trip down the Hole-in-the-Rock Road you will see to your right the aptly named Straight Cliffs. At first they will be quite distant to your west and slowly but surely the road will get closer and closer to the cliffs. About 50 miles after entering into Hole-in-the-Rock Road the Straight Cliffs will make a bend to the South and that is where you will search for a spot to leave your car. At N37 15.125 W110 58.400 is the ‘trailhead’ to Reflection Canyon. Do not expect any signs, parking lot, cairns, path or alike. There are none of these facilitators, you are now on your own … and this is just the beginning!
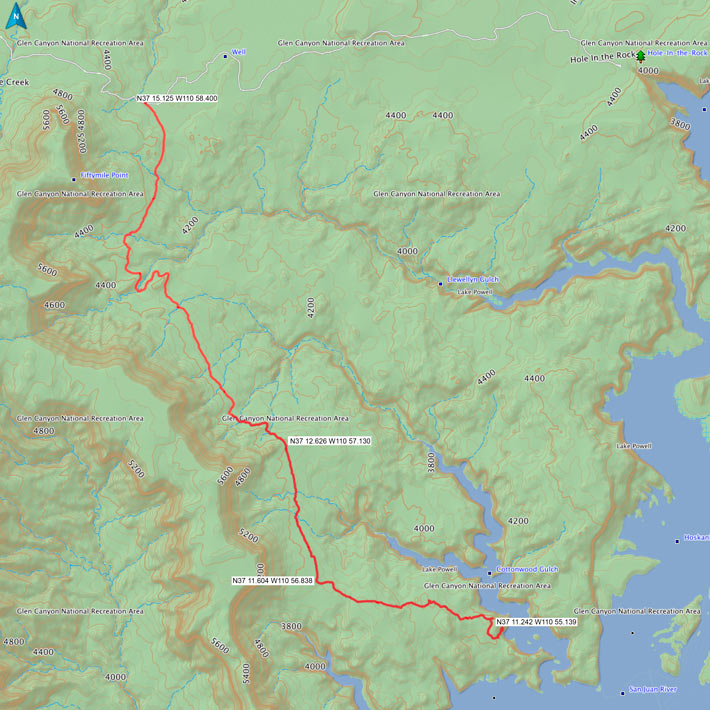
Get all your stuff ready. Check all your items to make sure that you have everything in your backpack. Have your GPS marked with the exact positioning of your car as well as the end point of your hiking (Reflection Canyon N37 11.242 W110 55.139). Additionally I recommend you clicking on the topographic map above to download a high resolution pdf file (55 MB) of my hiking route to take it with you in your backpack plus a compass!
The entire hike is about 8 miles long. Before you start hiking have a look into the landscape and absorb the topography as this will be your guide. The Straight Cliffs are pointing South and at the end of that line you will see some big sandstone towers and boulders (N37 12.626 W110 57.130) as well as the partially exposed Navajo Mountain in the background. Those landmarks will function as a beacon for your first leg. The distance from your car to those towers is about 3.3 miles beeline.
You obviously will not be able to get there in straight line. Try to be always as close as possible to the Straight Cliffs. The real difficulty is the constant up and down the ravines of the washes crossing the landscape. There are two or three major ones that further down the stream end up in unsurpassable deep slot canyons. This is the reason to stay close to the cliffs to pass the washes as ‘shallow’ structures.
Once you reached the towers you will have the feeling as you are walking around a corner. Finally you will be able to see the entire Navajo Mountain. Continue your hike along the Straight Cliffs for another 1.3 miles until you get to N37 11.604 W110 56.838. Reflection Canyon is now East-Southeast. You cannot see it from there, but you have to turn to your left and leave the Straight Cliffs in your back. The hike goes now progressively downhill for another 1.6 miles beeline. At N37 11.242 W110 55.139 you will have reached your goal.
Your way back is about the same as you did to get from your car to Reflection Canyon.
The map below provides you with graphical info to get from Escalante to the ‘trailhead’ and again back to Escalante.
Getting to Reflection Canyon on a boat:
On my last backpacking to Reflection Canyon I went light, without camera gear. The intention was to get there fresh enough to explore the entire area and hopefully find a descent to the water. It took a lot of scrambling. After three hours of search I finally found a route that allows access from the water to the Reflection Canyon overview! In the meantime I used it several times. It is a very nice thing to get to this place relaxed while on your way to it you can enjoy the entire beauty of the boat trip through Glen Canyon coming either from Bullfrog or Wahweap.
Photographic advices:
All depends on your decision – a one day in-and-out hike versus a multiple days backpacking.
One day in-and-out: If this is your option you should be aware that you will walk at least 16 miles off trail on this day. It will be a very long and exhaustive day. Speed and light gear are imperative. The most important elements in your backpack besides water and snack are the map, compass and GPS device.
Reduce your photographic stuff to an absolute minimum. Even extra battery and extra memory cards are already a luxury. Make sure that your battery is completely loaded and that your card will be able to store all your images for the day. Compromise with a normal range lens and leave all other lenses in the car. Tripod, ND grad filters and alike should also stay in the car.
The most important element during this hike is to be as light and fast as possible, have all the stuff you need for safe navigation, get to your destination, take your shots and get back to your car. An essential element to be in your backpack is a headlight in case you do not get back to your car before daylight is gone. This scenario is more than likely to happen and you certainly do not want to be caught in the dark while on trail without any light!
Multiple days backpacking: The crucial question for a multiple days backpacking is, how much weight can you carry? I did this hike in the middle of Summer’s heat. The most important element in my backpack besides my camera gear was WATER!
Otherwise, throw in all the photographic gear you have and you think will be important for you to have at your destination or along the hike, as there are multiple attractive views as you hike.
Any kind of lenses (wide-angle, normal range, telephoto) can and should be in your bag. The variety of lenses will give you ample creativity.
Polarizing filter is almost mandatory. ND grad filters with soft transition might be useful for early or late shots at your destination. This is specially true if your goal is to take shots with the moon rising above Reflection Canyon as I did on super-moon evening June 22, 2013.
Do not leave your tripod at home or in your car. You really will need it!
Make sure you pace yourself well so that you get at the Reflection Canyon overview early enough. There are several points of interest and you might want to spend some time there to find the spot of your preferred liking. All these different points do not have necessarily a very easy access, besides they are not close to each other. You will need to scramble around the rocks to find the right spot and that requires time. My favorite spot was at N37 11.242 W110 55.139!
Practical Advices:
There are several issues to be thought through before you start your trip as you want to get the best results out of it. The trip and hike are way too intense to leave things for a lucky draw.
The most important aspect to be considered is Lake Powell’s water level. You really want all the curves of the canyon exposed to achieve a highly dynamic view, specially when you have a boat speeding through the water. If the water is at a high level you will loose this effect and this is exactly what this location is all about! The best moment to have a lower level are probably during Summer and Winter. Spring and Autumn might present a higher water level due to the snow melt and the monsoon rain respectively. Drought certainly helps to keep the water level down and at the moment we are going through one to the point were the water levels of Lake Powell are as low as they were when the daming was started.
Another thought that might cross someone’s mind is to have the moon rising above Reflection Canyon. This is an unforgettable experience. I was there on June 22, 2013 to shoot super moon coming above the canyon. To find a perfect day for such a moment I recommend using the software The Photographer’s Ephemeris.
Two advices before you leave home:
1. Do not enter the Hole-in-the-Rock Road or the trail if there was a recent major storm in the proximity or there is a storm prediction. You might get stuck on the road or you might encounter on the trail not dry washes, but furious floods.
2. If you never did anything alike and you do not have any experience in hiking off trail this is not the right place to get started in collecting knowledge. This can end badly! If you still want to do it, despite my warnings, I recommend you to contact me. I can help you with my guiding expertise!
Last update: January 23, 2019
2 Comments
Leave a Reply Cancel reply
This site uses Akismet to reduce spam. Learn how your comment data is processed.


Thank you for the wonderful reflections! This is most defiantly on my bucket list. I’ve been scouring for information on the route up the cliff from the water to the top. Is this something that you’ve mapped out and might be able to share?
Thanks again for the very informative post.
Pat
Hi Pat, I do not provide written instructions, a map or waypoints to facilitate access to Reflection Canyon overview from the water anymore. The ascent is not a completely easy one. After experiencing once an almost significant accident with someone who I took up there. I concluded that I cannot take the risk of someone having some major injury based on some written instructions. Since then I decided only to take people up there personally who are in perfect physical and health condition.